On corporate networks, the company’s IT department will often create a network share drive where anyone with a computer connected to the network can place and exchange files over the network. On your home network, you don’t have an IT department to do this for you. You don’t have to worry, because there are lots of simple ways to accomplish this. Also, if you prefer, check out our YouTube channel where we cover some of the options mentioned below in a short video.
1. Nearby Sharing: Sharing Files in Windows 10
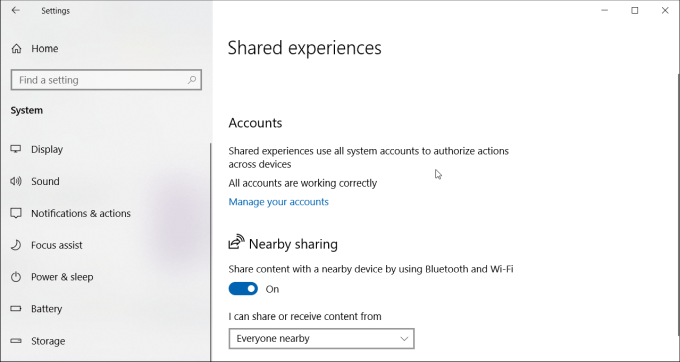
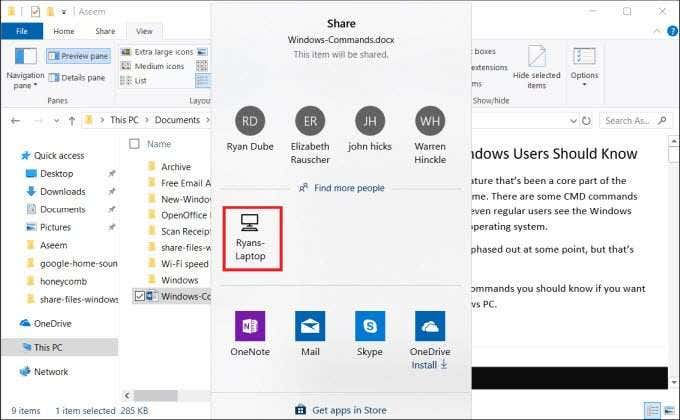
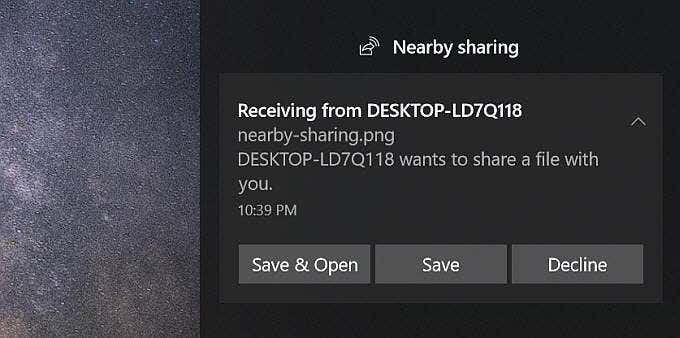
Prior to April 2018, sharing files over a home network required that you attempt to set up what was known as a “homegroup”. This was essentially a group of your computers on your home network attached to a common network group. It allowed for sharing files, but it was extremely complicated to set up and didn’t always work right due to security software or network firewalls. Thankfully, Microsoft introduced other, much easier ways to share files over a network (and over the Internet). Sharing over your local network involves a feature called Nearby Sharing. You’ll need to enable Nearby Sharing on all the computers you want to share files with. To do this: Once you’ve enabled Nearby Sharing on all the Windows 10 computers on your network, you can start sharing files with them. To do this, open File Explorer, right-click the file you want to share, and select Sharing. Now you’ll see all computers with Nearby Sharing enabled under the Find more people section. When you select that remote computer system, a notification will appear on the other computer that there’s an incoming file. Select either Save & Open or Save to initiate the file transfer. This process is far easier than using Homeshare ever was.
2. Transfer Files by Email
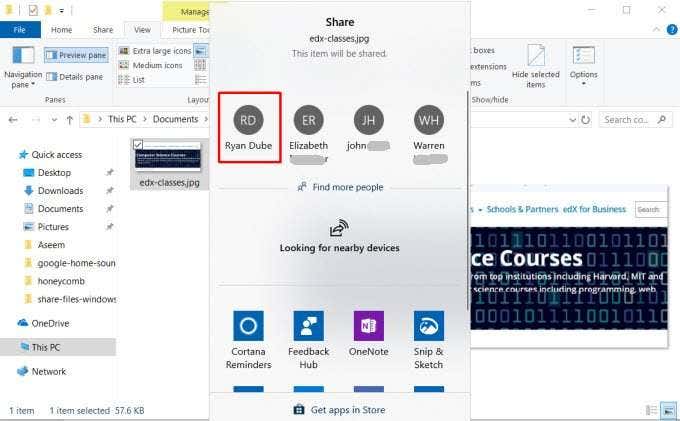
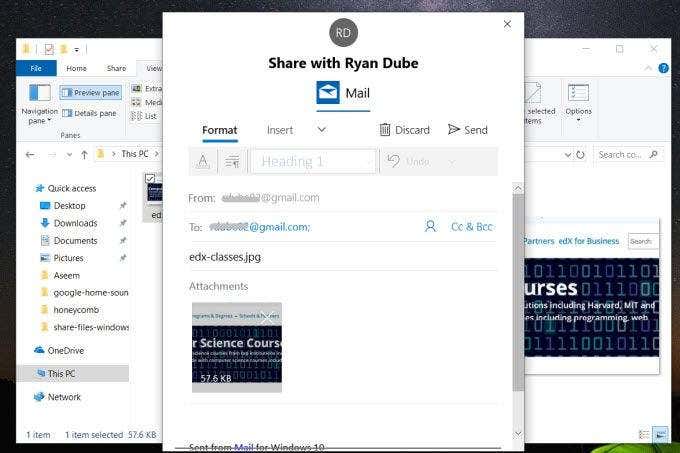
Another way to transfer files between computers, not only over your local network but over the internet, is sharing by email. The process is like Nearby Sharing. Just right click the file you want to transfer and select Share. At the top of the Share window, you’ll see your email contacts to choose from. Click on Find more people to open your email contacts and choose from your contact list. This will open an email composition page. You can edit the email or just click Send to send off the file. If you haven’t used the email service you select to use, you may need to provide Windows with permission to send email on your behalf. When you receive the file via email, you can receive it on any device – either another computer or any mobile device.
3. Transfer Files Via the Cloud
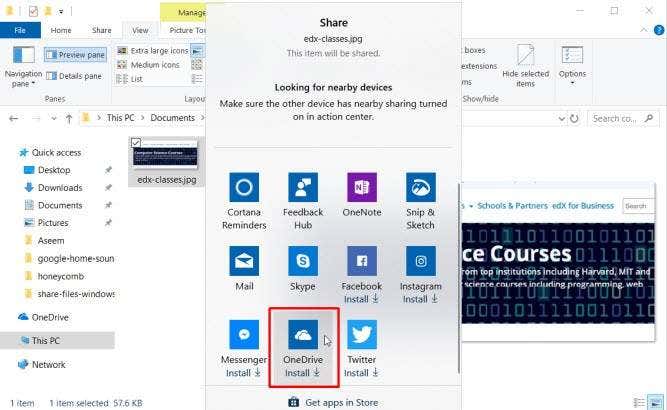
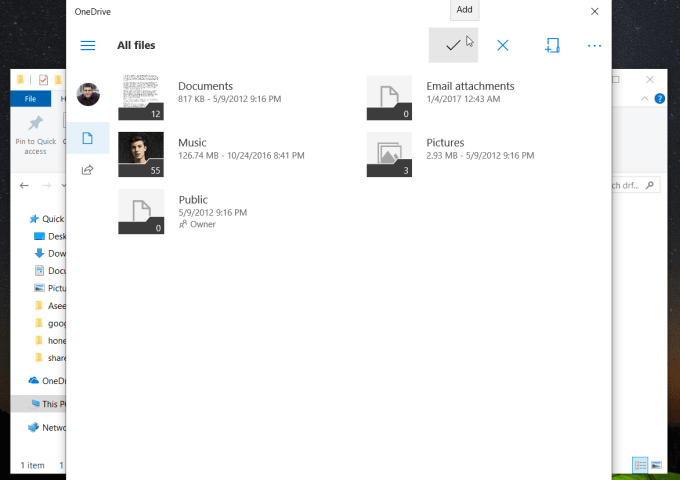
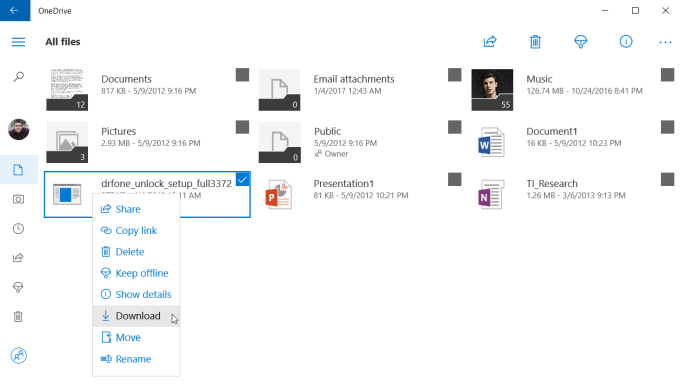
Another approach you can take to transfer files from your Windows 10 PC to other devices is via the cloud. You can do this by sharing the file to any Windows app that supports services like OneDrive or Google Drive. Just right click the file you want to transfer and select Share. At the bottom of the Share window, you’ll see a list of Windows apps to choose from. At least one of these should be OneDrive. When the app opens, just click the Add (checkmark) button to add the file to your OneDrive cloud account. The file will upload to your OneDrive account. When it’s finished, you can open the OneDrive app on your other computer (or mobile device with the OneDrive app) and upload it there. On the other computer, open the OneDrive app, right-click on the file, and select Download. This will complete your file transfer to the other computer on your network (or over the internet).
4. Use LAN File Sharing Software
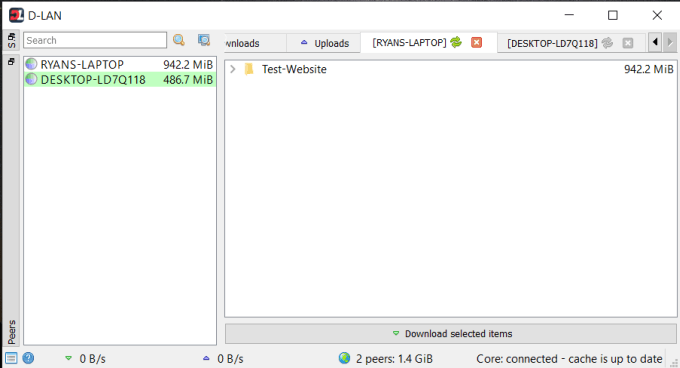
If you want to go beyond just transferring files and instead actually browse folders and files on the other computer, there are plenty of LAN file sharing applications for Windows 10 that can help. One of those is D-LAN. D-LAN is a free application that’s easy to set up and use. It’s so easy that all you do is install the application on all the computers you want to share files back and forth from, and you’re done. You right-click in the right pane to add a new folder on that computer. Viewing the D-LAN application on the other computer, you’ll see the new folder show up in the pane for the computer you’re sending from. Once you see all the folders, you can open them and add or remove files just like you would in File Explorer.
5. Use FTP Client/Server Software
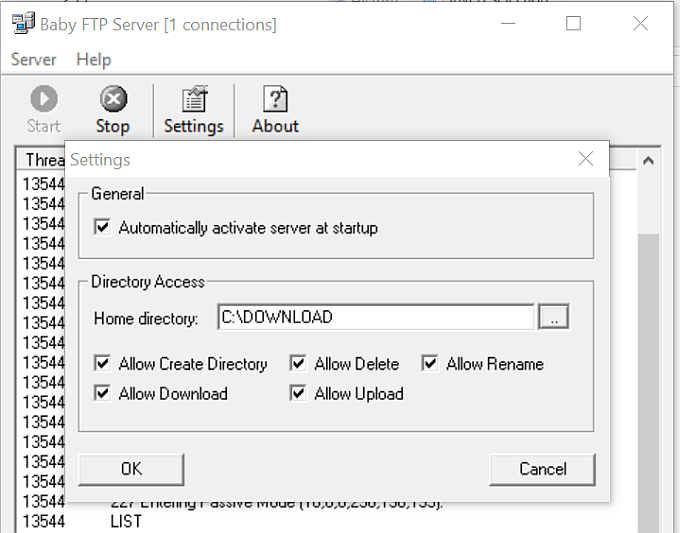
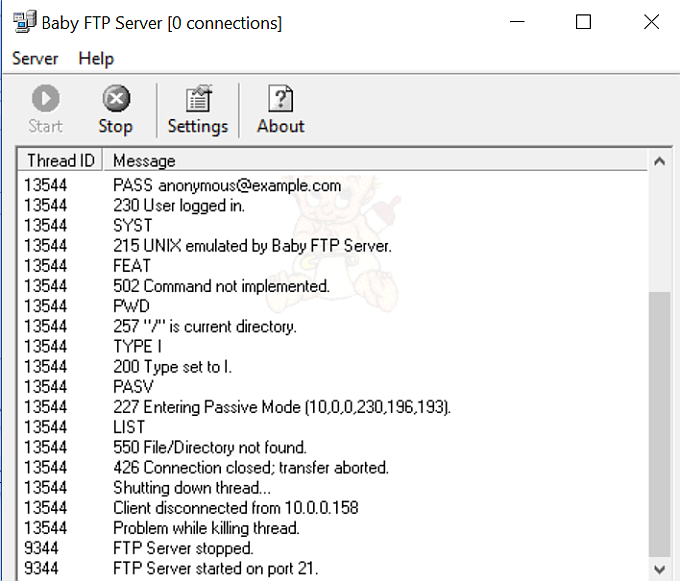
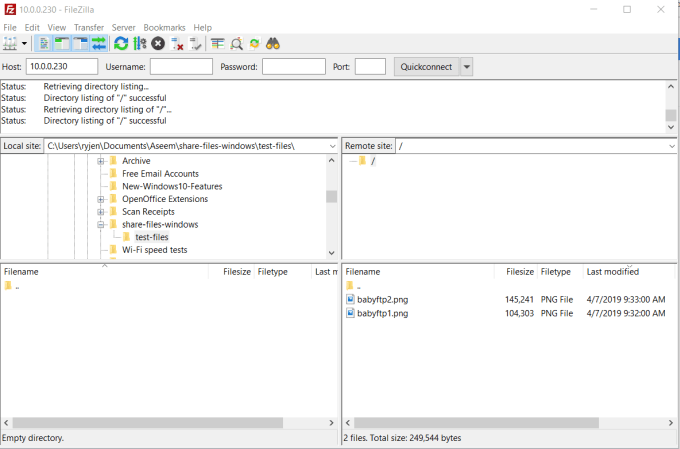
Another excellent solution is using FTP as a quick file transfer over a LAN. Running an FTP Server on one computer allows you to connect to it over Port 21 using FTP client software on another computer. The problem with many FTP server applications is that they’re complicated to set up and configure. Thankfully there are several FTP server apps that are quick and simple. BabyFTP is one of those. With BabyFTP, you simply install the application and it’ll launch a simple anonymous FTP server on the originating computer. In Settings, you can configure the folder to transfer files from and to, and what actions you want to allow like adding or removing directories and files, and whether those can be modified by the remote client. Once you start the BabyFTP server, you should see “FTP Server started on port 21” if everything is working properly. Now, on the other computer, you can use any FTP client, like FileZilla, to open a connection to that remote computer using it’s IP address and port 21. No ID or password is necessary with this application since it uses only anonymous connections (which is fine inside your secure home network). Once you connect, you’ll see the remote directory you’ve set up in the remote site location. You can right click files there to upload them to your local computer, or right-click files on your local computer to transfer them to the remote one.
Transferring Files Between Windows 10 Computers
It’s amazing that something as simple as transferring files between computers can be so difficult without third-party software and other solutions. Thankfully, there are lots of choices for making the process as simple and easy as possible.

