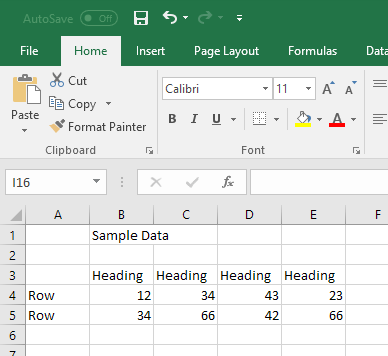
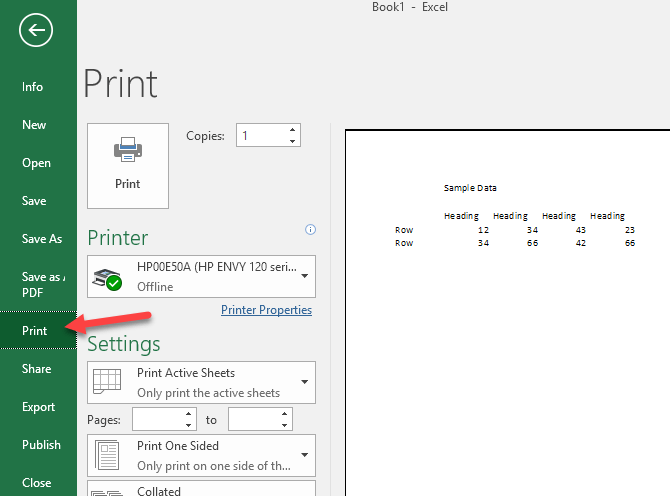
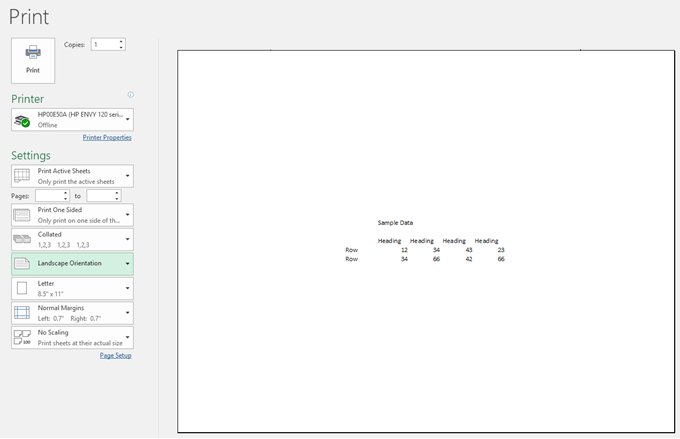
There is an easy way to center the data on the printed page. You can center the data horizontally, vertically, or both. To see how your worksheet will display when printed, click on File and then Print. You’ll get a preview of the document at the far right.
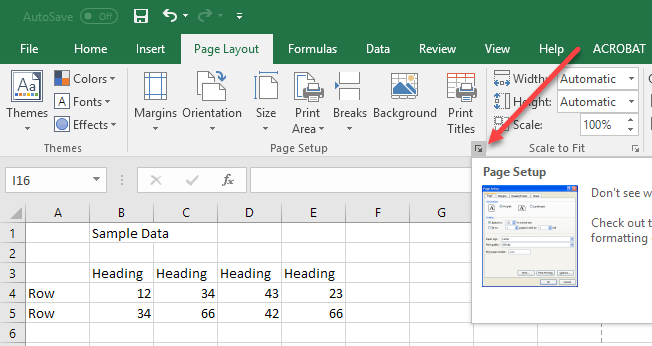
When the sample worksheet above is previewed, you can see that it is placed in the upper, left corner of the page. This is how it will print. To center the data on the printed page, click the Page Layout tab. Then, click the arrow button in the lower, right corner of the Page Setup section of the Page Layout tab.
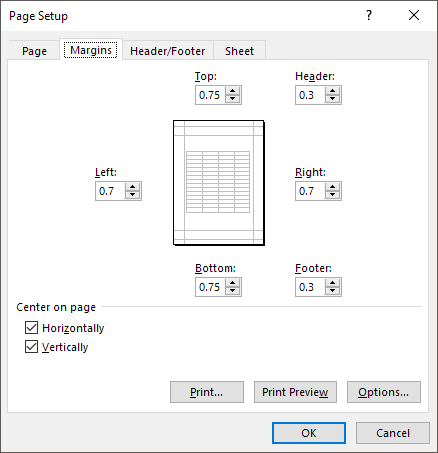
The Page Setup dialog box displays. Click the Margins tab. Under the Center on page heading, select the Horizontally checkbox if you want the information centered left-to-right between the margins of the page. Select the Vertically check box if you want the information centered top-to-bottom between the margins of the page. Select both checkboxes if you want the data centered in the page both horizontally and vertically.
Click the Preview Preview button and now you will see the data centered on the page. You can also change the page orientation and it will remain centered.
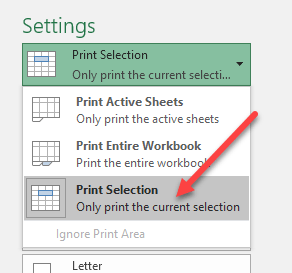
Centering data on a page is effective only for the currently selected sheet. Therefore, even if you have a full page of data on Sheet 2, you can center the smaller set of data on Sheet 1 without affecting other sheets. Also, if you have a sheet with a lot of data on it and you only want to print out one section of the sheet, but still want it centered, then you can do that by first selecting the data you want to print. Once you have the data selected, go to File Print and you’ll see a dropdown right below Settings.
You can choose to print the active sheets, print the entire workbook or print on the current selection. This is really handy as you might have a huge worksheet, but only need to print a summary graph or chart. Enjoy!
