Even if I ran the spell checker manually, it would complete without marking or correcting any of the misspelled words! Annoying! After doing some research, I found a couple of possible solutions. You might run into this problem in Word 2007, 2010, 2013 or 2016.
Method 1 – Enable Proofing in Word
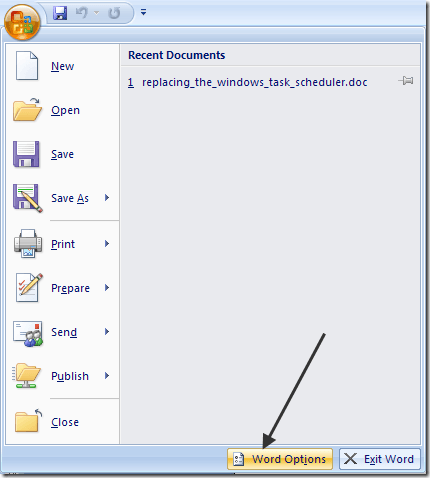
Since Outlook uses Microsoft Word for spell-checking, you have to make sure that spell-checking is working in Word first. In older versions of Word, click on the round Office icon at the top left and then click on Word Options.
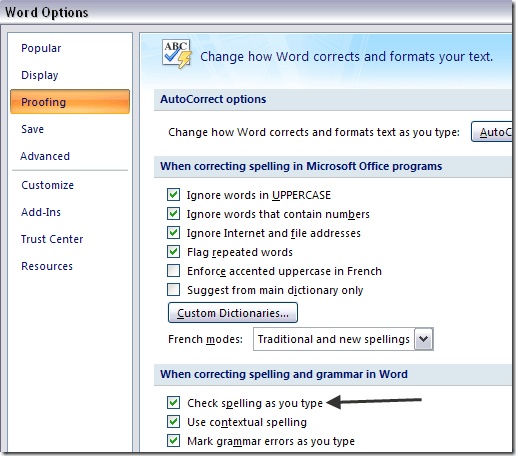
Click on Proofing and make sure that the Check spelling as you type box is checked under the When correcting spelling and grammar in Word section.
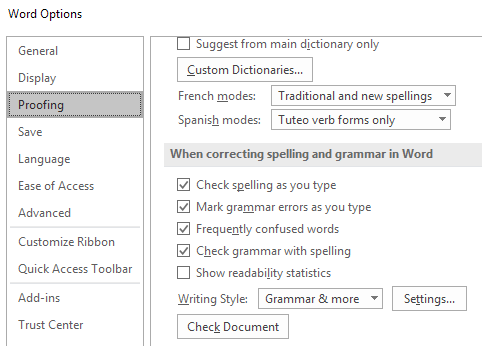
If newer versions of Office, you click on File and then Options. You also have the option to check grammar along with the spelling, if you like.
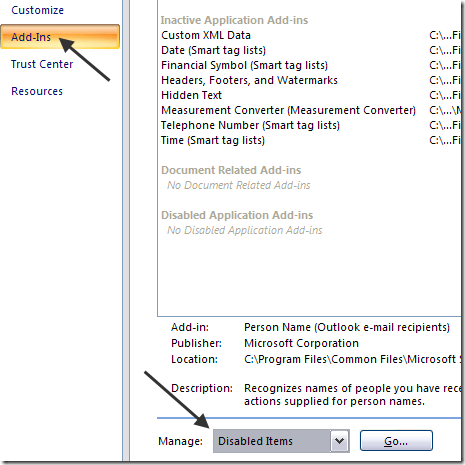
Once you do that, you need to click on Add-Ins and then choose Disabled Items from the Manage drop down menu at the bottom. Then click the Go button.
Make sure that Proofing is not disabled. If it’s in the list of Disabled items, make sure to re-enable it.
Method 2 – Delete Registry Key
If that method didn’t work, you may have to try a different approach. You can do this by deleting a registry key that will not adversely affect Word or your Office programs. Navigate to the following registry key: Depending on what version of Word you have, it may or may not be 12.0. Delete the entire Word key. When you reopen Word, it will recreate all the keys and subkeys for you. Also, restart Windows after deleting the key. This should hopefully fix the spell checking issue. If not, you can navigate to the following key: Simply delete the Override key. In normal versions of Office, you do not need this key at all, so it is safe to remove.
Method 3 – Repair Office
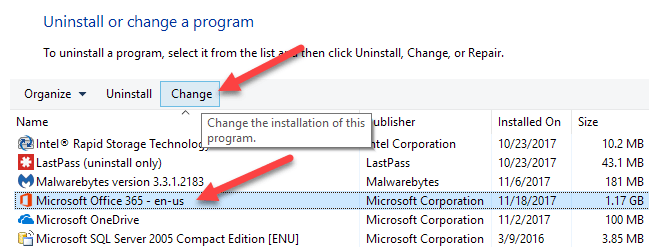
If none of that worked for you and Outlook is still not spell checking correctly, you can try to repair the installation. You can do this by going to Control Panel, Add/Remove Programs or Programs and Features, clicking on Microsoft Office and then clicking on Change.
Then choose the Repair option and allow the program to repair the installation. In newer versions of Office, you can choose between a quick repair and an online repair, the latter of which is more comprehensive. It may take quite some time for the repair to complete. After it is finished, make sure you restart your computer.
That’s about it! If you are still having this issue, post a comment here and I will try to help! Enjoy!