In this tutorial, you’ll show you how to change the boot order in the BIOS or UEFI on your Microsoft Windows 10/11 PC. But before you do that, you may want to consider using the One-Time Boot Menu instead.
How to Use the One-Time Boot Menu
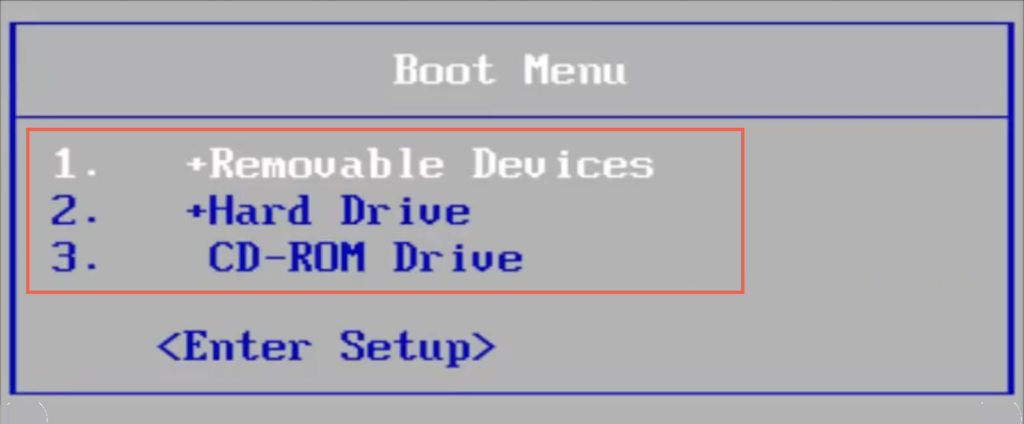
The best way to change the boot order in Windows is to use your PC’s One-Time Boot Menu for one-off instances. That involves pressing a specific key—such as Esc or F12—immediately during the startup boot sequence. Tip: You may see the Boot Menu key listed within the splash screen at computer startup. If not, check your motherboard’s user manual or online documentation for the correct key. After loading the One-Time Boot Menu, use the Up and Down directional arrow keys to select the device you want to boot from and press Enter. However, if you want to boot from the same device multiple times or configure your PC to give preference to external media, it’s best to make a permanent change to the boot order via the BIOS or UEFI.
How to Access BIOS and Change Boot Order
BIOS stands for Basic Input/Output System. It’s low-level software that verifies your computer’s hardware by performing a P.O.S.T. (Power On Self Test) at startup. If everything then appears okay, it loads Windows from internal storage. However, you can instruct your computer’s BIOS to look elsewhere for bootable media, such as an optical disc or removable USB drive.
How to Access the BIOS Settings
To change the boot order, you must instruct your PC to load the BIOS user interface by pressing the BIOS Setup key at computer startup. It varies for each motherboard manufacturer, so here’s what you can do to enter BIOS:
Press the BIOS Setup key listed within the splash screen at startup.Experiment by pressing the most common keys—F2, F9, F10, F11, and DEL.Check your PC or motherboard’s user manual or online documentation.Look for an option to Enter Setup inside the One-Time Boot Menu.
Tip: Press the BIOS Setup key quickly multiple times during the boot sequence. If you see the Windows logo, you must reboot your PC and try again. If you’re running a newer Windows 11/10 PC, then skip down to the UEFI section, which has a different method to access the BIOS.
How to Change Boot Order in BIOS
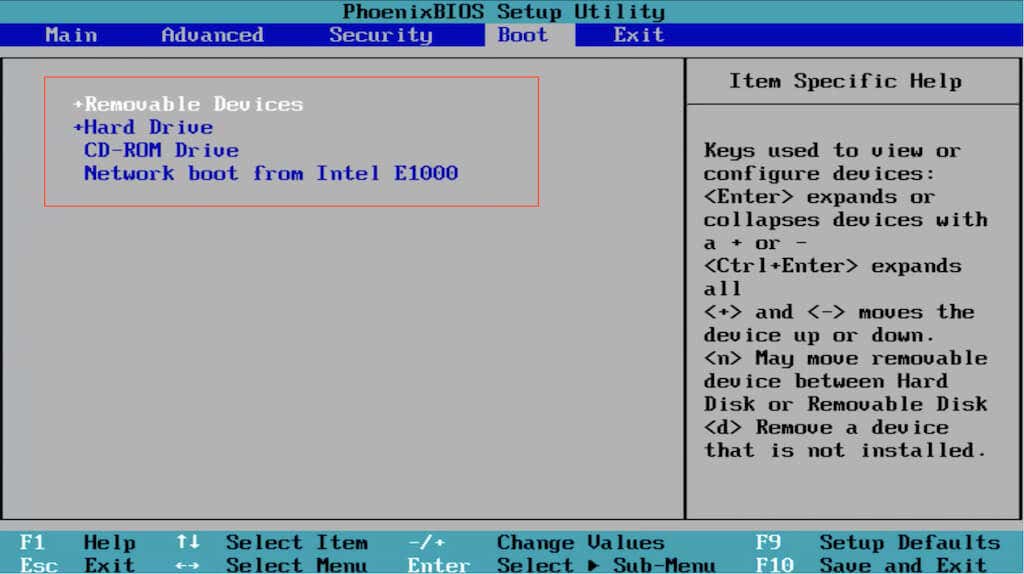
After loading the BIOS setup utility, you can change the boot order after locating the list of bootable devices or the boot order. The exact method varies between motherboard manufacturers, but you should get the general idea with the following steps.
- Navigate to the tab or section—e.g., Boot or Advanced BIOS Features—that displays the list of boot devices or your computer’s boot order.
- Highlight each device (Removable Devices, CD-ROM, Hard Drive, etc.) and arrange them in the order you want. If the BIOS displays options such as the First Boot Device, Second Boot Device, Third Boot Device, and so on, select each item and pick a device on the pop-up menu.
- Save your changes and exit the BIOS. BIOS requires the keyboard for navigation. You’ll find a list of keys with their corresponding actions listed at the bottom and right sides of the screen, such as:
Left, Right, Up, and Down directional arrows — Switch between tabs or highlight items.Enter — Select highlighted items.Plus (+) or Page Up — Move highlighted items up a list.Minus (–) or Page Down — Move highlighted items down a list.F10 — Save and exit.
How to Access UEFI and Change Boot Order
If you use a new PC, the chances are that it uses UEFI (or Unified Extensible Firmware Interface). It’s faster and more efficient than the BIOS, with support for larger storage drives. The procedure to change the boot order is essentially the same as the BIOS, if not easier. Note: Despite using UEFI, your motherboard manufacturer may refer to it as the “UEFI BIOS” or just “BIOS”.
How to Access the UEFI
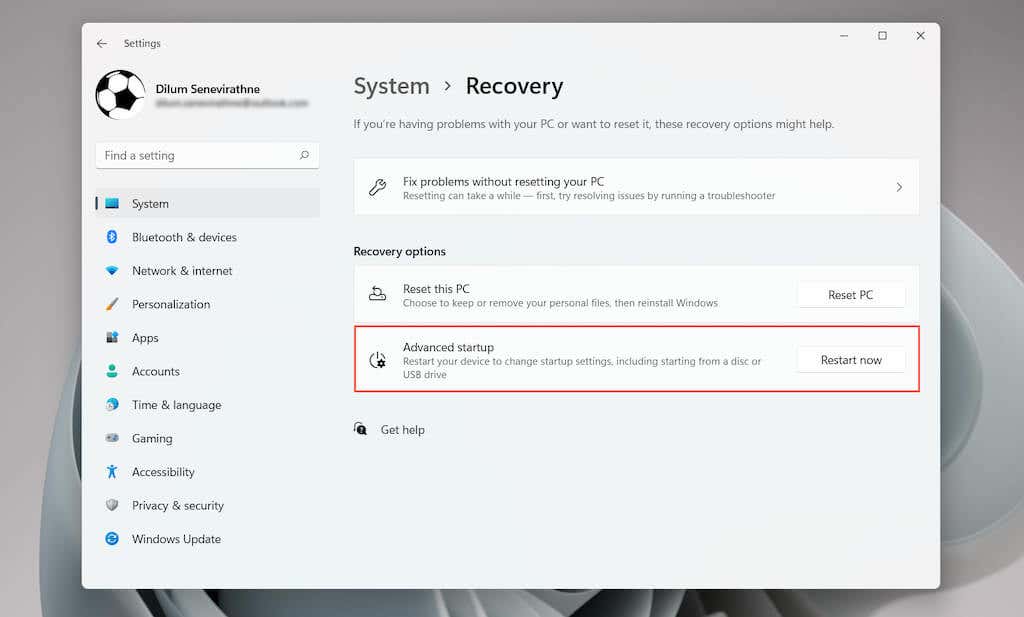
Depending on your PC’s motherboard, you might be able to load the UEFI Setup by pressing the relevant key at startup or by experimenting with the F2, F9, F10, F11, and DEL keys. You could also check your motherboard’s user manual or online documentation for the exact key. However, it’s possible to enter the UEFI on any PC via the Advanced Startup Options screen in WinRE (Windows Recovery Environment).
- Boot into Windows 10/11.
- Launch the Start menu and open Settings. Then, go to System/Update & Security > Recovery > Advanced Options.
- Select Restart now.
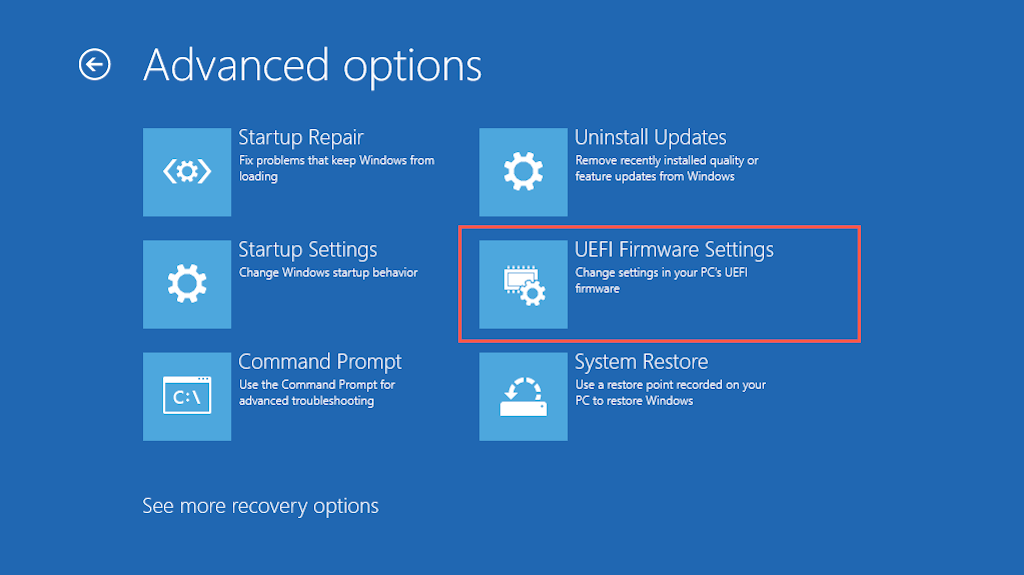
- Wait until your PC reboots and loads WinRE.
- Select Troubleshoot > Advanced options > UEFI Firmware Settings > Restart to load the UEFI. Tip: If you have trouble booting into the Windows desktop, hard reset your PC at the Windows logo three times to enter the Windows Recovery Environment.
How to Change Boot Order in UEFI
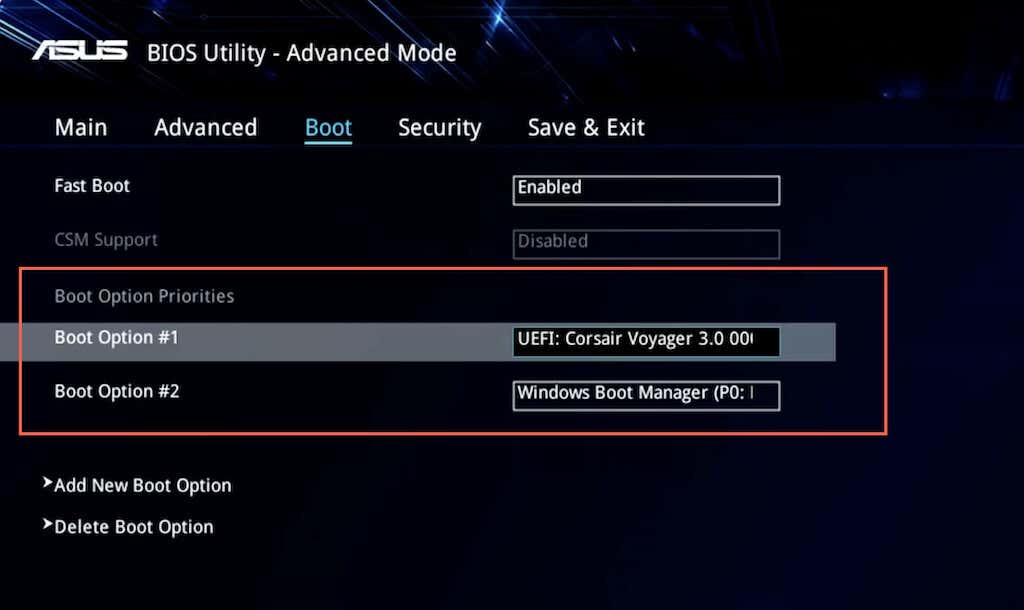
Most UEFI interfaces support mouse and trackpad navigation. If yours don’t, use the keyboard hotkeys at the bottom and right sides of the screen to interact with the menu options. UEFI interfaces are also slightly different from each other. For example, the UEFI in ASUS laptops displays an EZ Mode that only shows a list of standard options. Look for a Boot Priority or Boot Sequence section to change the boot order. Or, you can switch to Advanced Mode (you’ll see the option listed somewhere on the screen) and go through the following steps.
- Navigate to the Boot tab within the UEFI.
- Look for a list of bootable devices or a boot order (e.g., Boot Options #1).
- Change the boot order as needed—e.g., set a USB device as the first boot device and Windows Boot Manager as the second.
- Switch to the Save tab and save your changes. Note: UEFI uses a feature called Secure Boot that prevents you from loading operating systems—such as Linux—from external storage devices. To disable the functionality, look for a Secure Boot option within the UEFI (usually located under the Security tab) and set it to Disabled.
How Your PC’s New Boot Order Works
Depending on how you change the boot order, your PC will check the first boot device for bootable media. If it fails to detect any, it will look at the next device within the list and so on until it finds a setup or operating system that it can boot into. If you want to change the boot order at a later time, re-enter the BIOS or UEFI and set your hard disk drive or SSD as the first boot device.

