Of course, there are times when you may need to bypass a lost admin password. If you’ve been given an old PC with an existing user account, you may not have the details you need to wipe your PC and repurpose it. To factory reset Windows 10 without the admin password, you’ll need to follow these steps.
How To Factory Reset Windows 10 From The Login Screen
If you don’t have the admin password for a Windows PC, you can reset Windows 10 to factory settings pretty easily from the login screen.
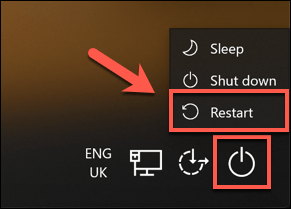
In the bottom-right corner of the login screen, you’ll see options to change your network settings, access Windows accessibility options, or power down your PC. To begin resetting your PC, hold down the Shift key on your keyboard. With the key held down, press the Restart option under your power menu.
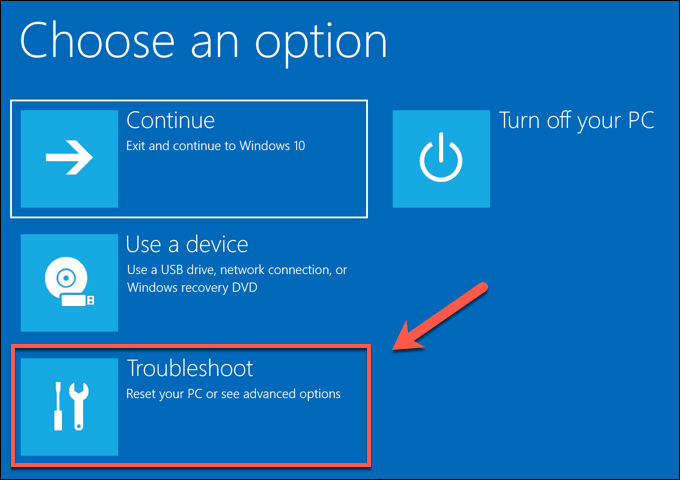
This will reboot Windows 10, but rather than loading the operating system as normal, you’ll be presented with the boot options menu. Click the Troubleshoot option to proceed.
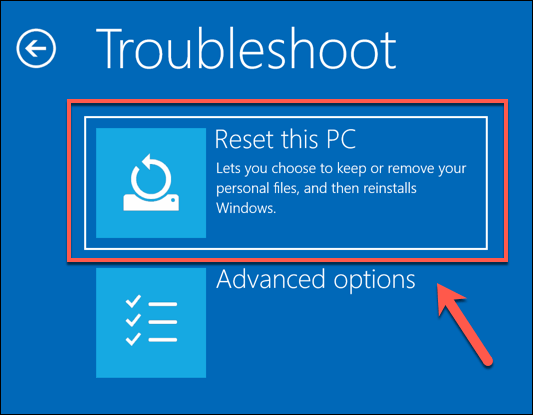
In the Troubleshoot menu, click the Reset this PC option.
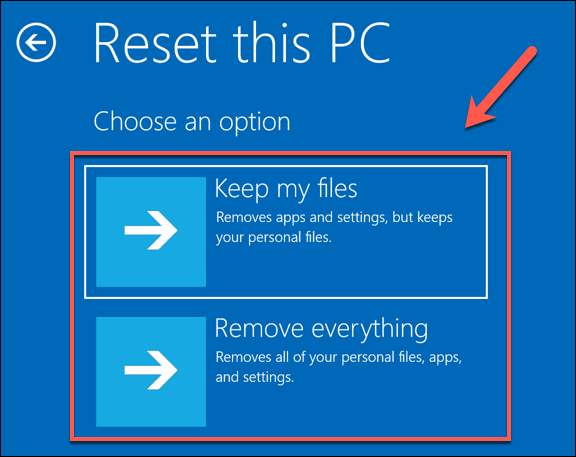
You can choose to save your files or reset Windows 10 completely, removing all files and settings. To save your files, click the Keep my files option. Otherwise, click Remove everything instead.
This will begin the reset process, and you may need to follow further on-screen instructions to proceed. Once the process is complete, you’ll be able to set up your Windows PC with a new user account, bypassing the old admin password entirely.
Using Windows Installation Media To Reset Or Reinstall Windows
The easiest method to factory reset your Windows 10 PC without the admin password is to use the method above. If your PC is having problems, however, you could decide to wipe the hard drive entirely, using Windows installation media to reinstall or reset Windows. You can download the Windows 10 installation disk image from the Microsoft website. This can be burned to a fresh DVD or flashed to a USB flash drive. If you have a second Windows 10 PC available, you can flash this ISO file to your USB drive using the Rufus flashing tool. Linux users can WoeUSB to do this, while macOS users could use the official Boot Camp Assistant app, which is installed on all Mac devices.
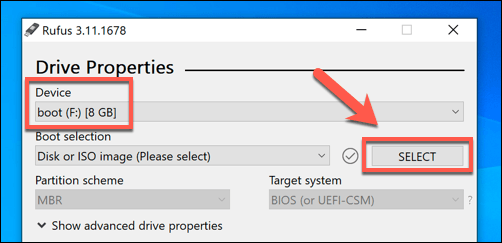
If you have the Windows 10 ISO file and Rufus tool downloaded, open Rufus on your second Windows PC. Make sure your USB flash drive is selected in the drop-down menu, then click the Select button to select your ISO file.
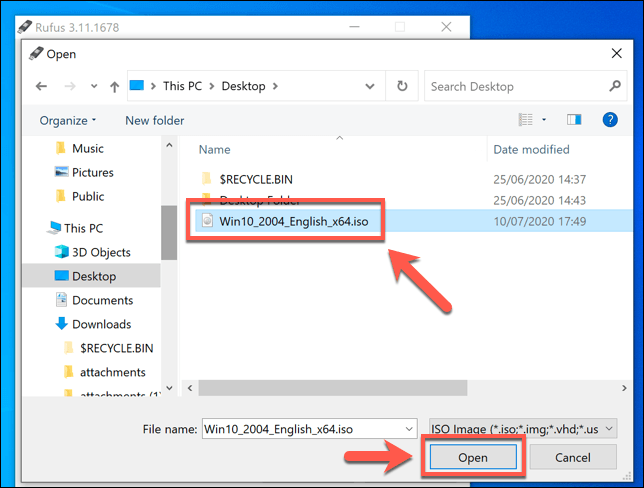
Select your Windows 10 installation ISO file from the file selection menu, then click Open.
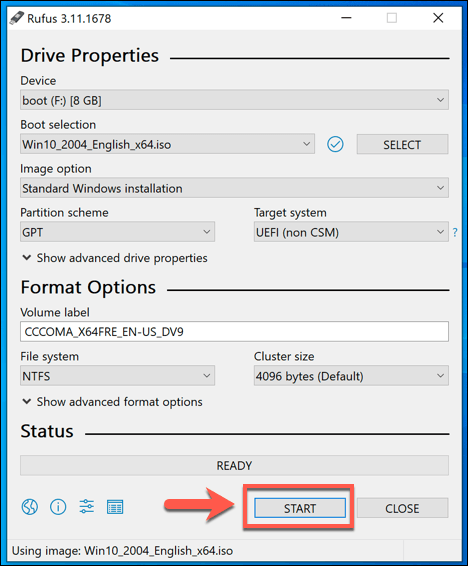
Rufus will automatically change its settings to match the requirements to flash a bootable USB Windows installation drive. Once you’re happy with the settings, press the Start button to flash your drive. This will wipe it, so be sure to backup any important files saved on it before you begin.
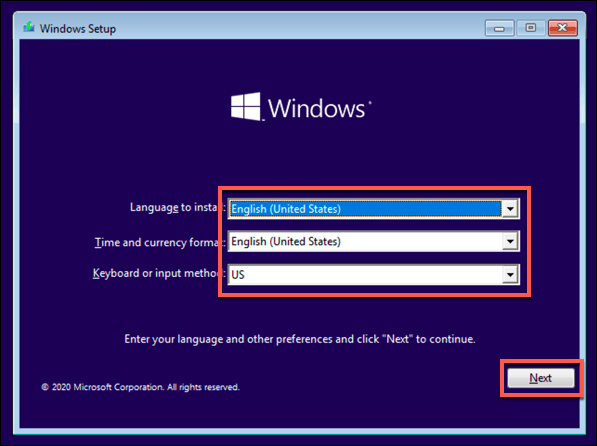
This will take a bit of time to complete. Once Rufus has finished flashing your USB flash drive, restart your PC to boot into the Windows installation screen. At the Windows installation screen, you’ll need to select the language to use during the installation process. You’ll also need to select your time and currency locale, as well as the keyboard locale to use. Once you’re ready to proceed, click the Next button.
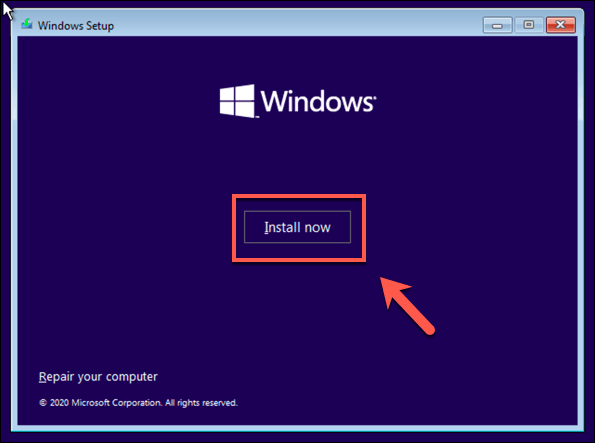
Click the Install now button to start the installation process.
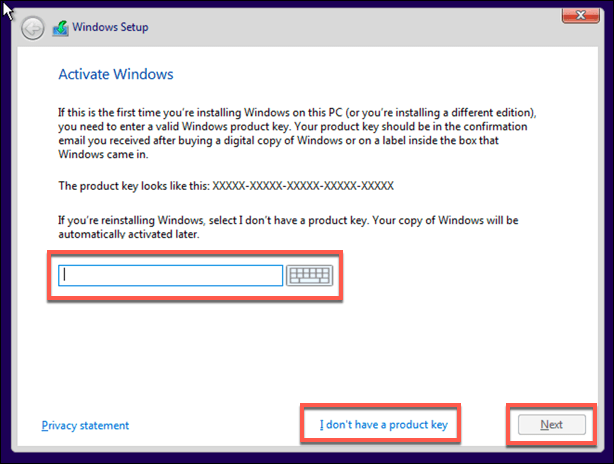
The Windows installation files will load at this point. You may need to provide a Windows 10 product key at this point to activate the installation, so type this key here. If you don’t have a key, type the I don’t have a product key option. You’ll need to activate Windows after the installation is completed if you choose this option.
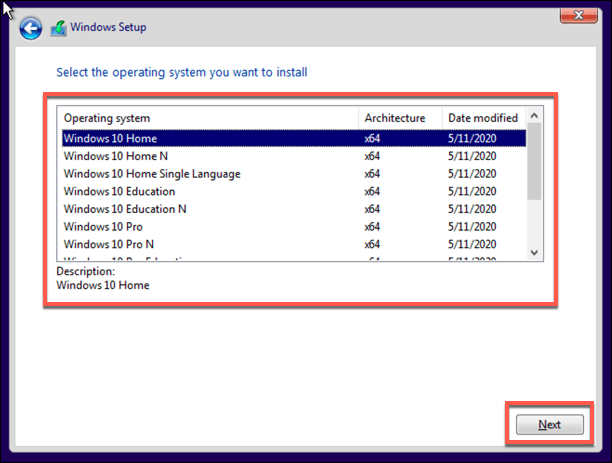
If the option is available, select the version of Windows 10 you wish to install, then click the Next button.
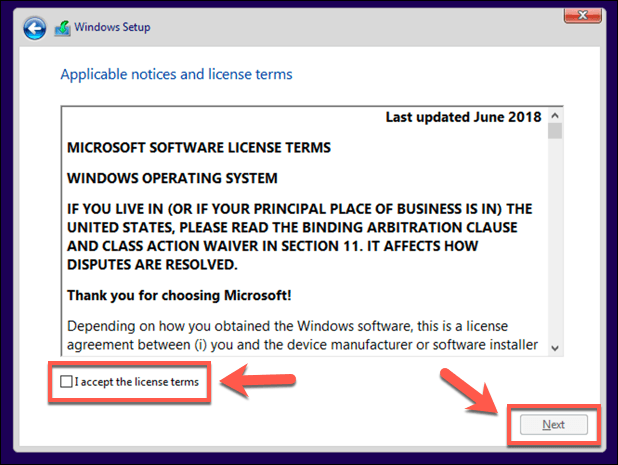
You’ll need to accept the Windows 10 license agreement next. Click the I accept the license terms checkbox, then click Next to proceed.
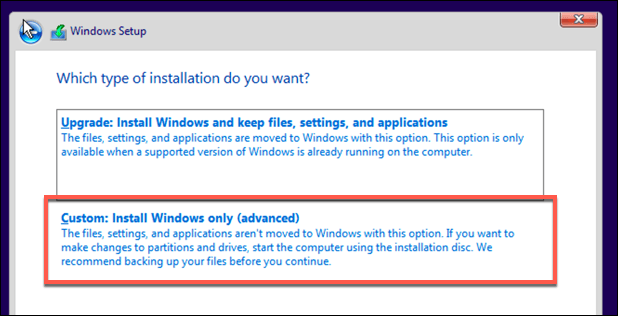
The installer will detect an existing Windows installation. To bypass the admin password, it’s better to choose the Custom: Install Windows only (advanced) option here. This will wipe all files from your PC before reinstalling Windows.
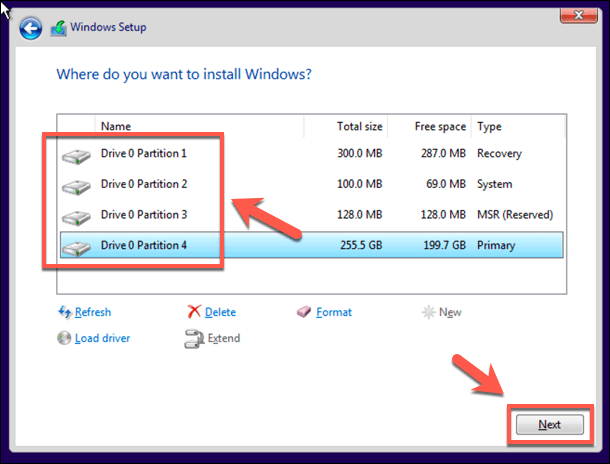
Select the drive to install Windows at the next stage. If you have multiple partitions, you might need to delete and recreate these first. Select Next to continue.
At this point, Windows will begin wiping your drive and copying files for the new installation. Windows will then reboot to begin the next stage of the installation process, allowing you to create a new user account once the process has completed to allow you to use the PC again.
Resetting Your Admin Password Using Manufacturer Recovery Files
Some PC and laptop manufacturers include a special recovery partition drive that allows you to restore your Windows 10 installation back to the factory default. This can usually be activated by restarting your PC and pressing a certain key on your keyboard during the boot-up process. The key you press will vary, depending on the device manufacturer. For instance, some HP computers require you to press and hold the F11 key on your keyboard as your PC boots. Each manufacturer has its own on-screen instructions for how to activate and trigger this process. Consult the user manual for your PC or laptop for any special instructions on how to use a recovery partition on your PC, as well as to determine the right key to press. If your PC doesn’t have a recovery partition available, you’ll need to use one of the methods listed above to factory reset Windows 10 instead.
Starting Again On Windows 10
Once you know how to reset Windows 10 without the admin password to hand, you’re ready to start again. Your first task is to use a password manager to help you generate a secure password for your PC. You can set up Windows without a Microsoft account, but you’ll lose access to some additional Windows features. You could switch to a passwordless login on Windows 10 to be able to ditch passwords completely. Once your PC is reset and ready to use, you’ll need to think about the new software you’ll need to immediately install, from a new web browser to an antivirus to keep your PC safe from malware.
