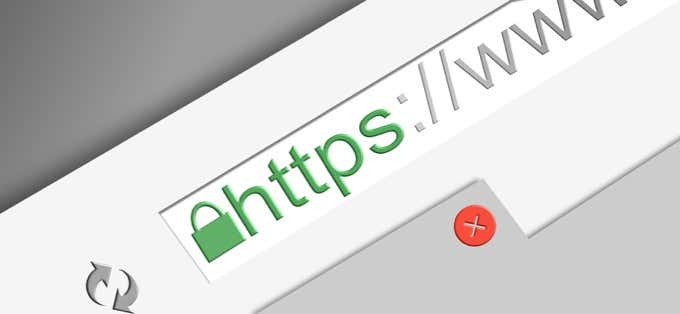
This is because google starting displaying a warning message in its Chrome browser whenever a user would visit a website URL that started with HTTP rather than HTTPS. To make sure your website is up to web security standards, you’ll want to purchase an SSL certificate and install it on your website.
Determine Your Dedicated IP Address
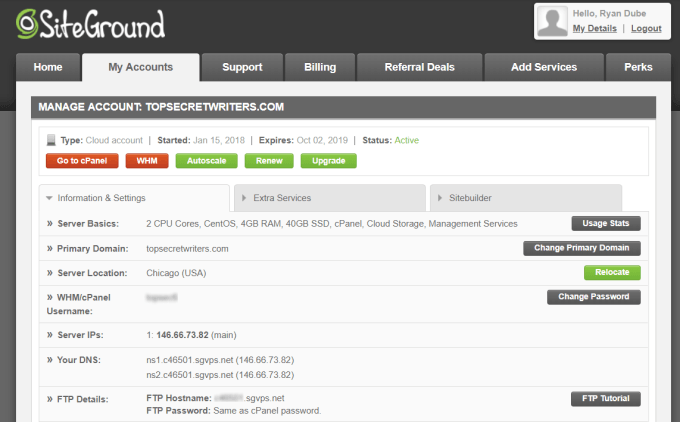
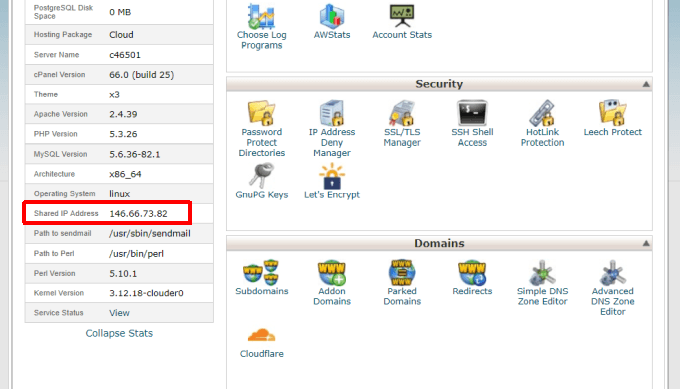
For an SSL certificate to work, your web server needs to have a fixed, dedicated IP address. If you have a dedicated web server, you can usually find this IP address listed in your web hosting account. If you don’t see it there, you can also find the server IP address in the left pane of the cPanel tool. Make a note of this IP address, since you’ll need it in the next step when you obtain your new SSL certificate.
Install Your Web Host’s SSL
Certificate
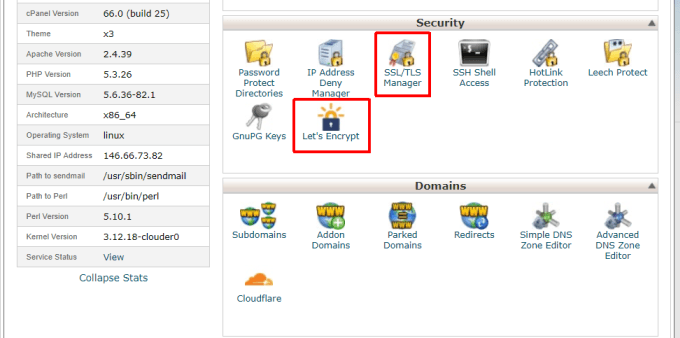
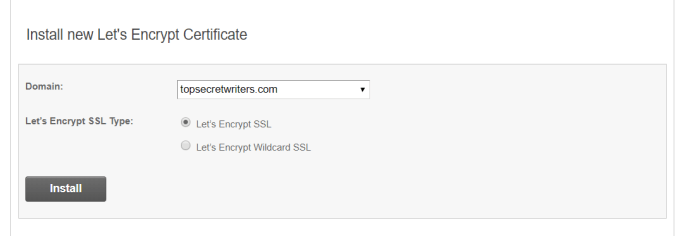
The next step is to obtain an SSL certificate for your website. Since all websites on the internet these days need to use SSL if you want to make sure your users trust your website, many web hosting providers have started packaging free SSL certificates with hosting packages. If this is the case for you, look through the cPanel menu and look for a tool icon that matches the brand of a known SSL certificate provider. For example, the web host Siteground offers customers a free subscription to Let’s Encrypt SSL certificates. If this is the case, you’re in luck. Installing SSL on your site is as easy as clicking on the SSL tool icon, selecting the domain you want to protect, and enabling SSL for that site. Once it’s installed, your website will have SSL installed and will start displaying to visitors as a secure website. If you don’t see an SSL tool available in cPanel, contact your web host just to confirm that they really don’t offer SSL certificates. If they don’t then you’ll need to purchase one yourself and install it manually using the steps below.
Purchase a New SSL Certificate
You’ll need to find a good SSL certificate provider. The cost of this service is relatively cheap, ranging anywhere from $30 to $100 a year. Some of the top SSL certificate providers in the world today include:
Let’s Encrypt: Free, but requires you to frequently re-upload the certificate to renew it.Comodo SSL: Expensive, but offers a long list of extra features.Digicert: Inexpensive basic SSL to a pro version for large websites.GoDaddy: Well known for their web domain services, GoDaddy also sells website certificates.Network Solutions: Provides affordable basic SSL certificates for small sites as well as more expensive options for larger organizations.RapidSSL: This service is run by Symantec and offers some of the most affordable SSL options around.
To purchase the SSL certificate, you’ll need the name of your domain, and the dedicated IP address of the web server that you noted above. Once purchased, you’ll receive three pieces of information. A Certificate (CRT), which verifies your secure website’s authenticity from the certificate provider’s servers. A Private Key (KEY), which serves as the “key” that’s used to decrypt and encrypt your certificate details when visitors visit your site. The key encrypts communication between the visitor’s web browser and your web server. The CA Bundle is the third piece of information which bundles all of the intermediate certificates that make the overall encrypted SSL certification work. Once you have these three pieces of information from your SSL provider, you’re ready to install the SSL certificate on your site.
How to Install an SSL Certificate
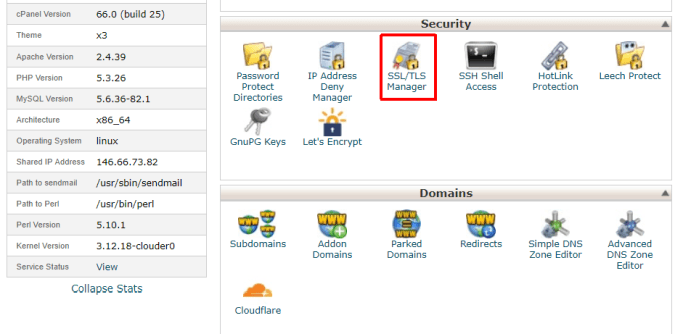
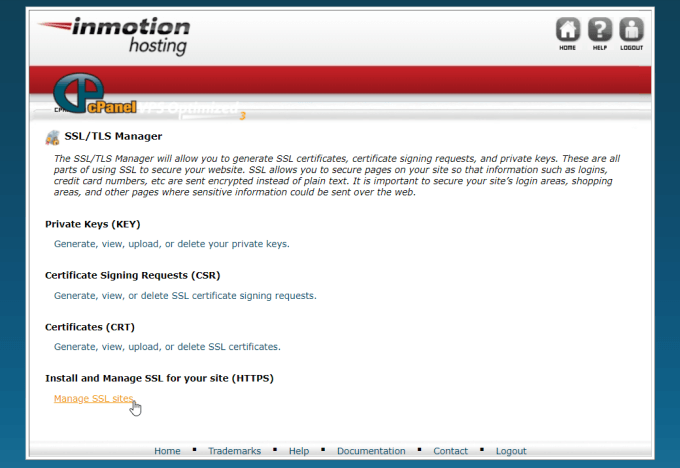
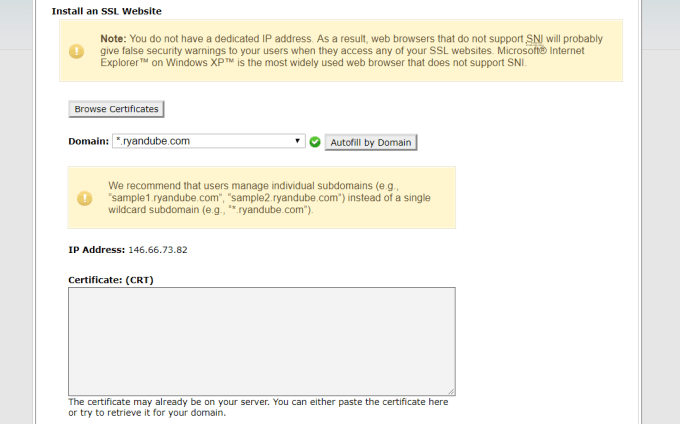
Log into your web hosting account and open the cPanel. Under Security, select the SSL/TLS Manager. In the SSL/TLS Manager window, select the Manage SSL sites link at the bottom. In the Manage SSL Hosts window, scroll to the bottom where you’ll find Install an SSL website. Use the dropdown in this section to choose the host you want to apply the SSL certificate to. Then, in each field for Certificate, Private Key, and Certificate Authority Bundle (CA Bundle), fill in the long text entries you received when you initially purchased the SSL certificate. Select the Install Certificate button at the bottom when you’re done. Now your SSL certificate is installed for that domain, and will work whenever visitors type in your domain with the https in front of it.
Force Site Visitors to Use SSL
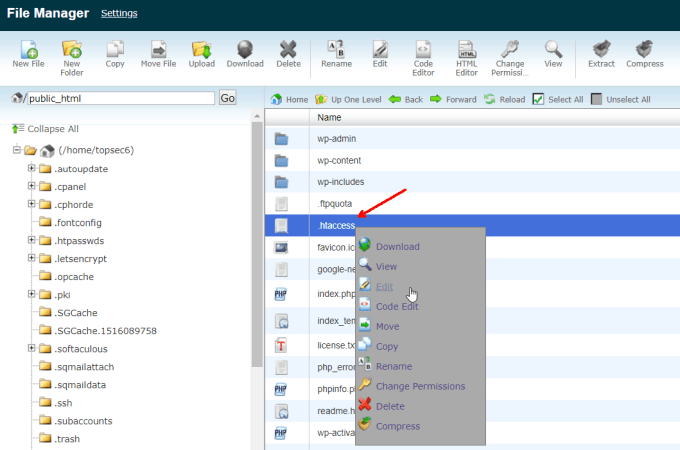
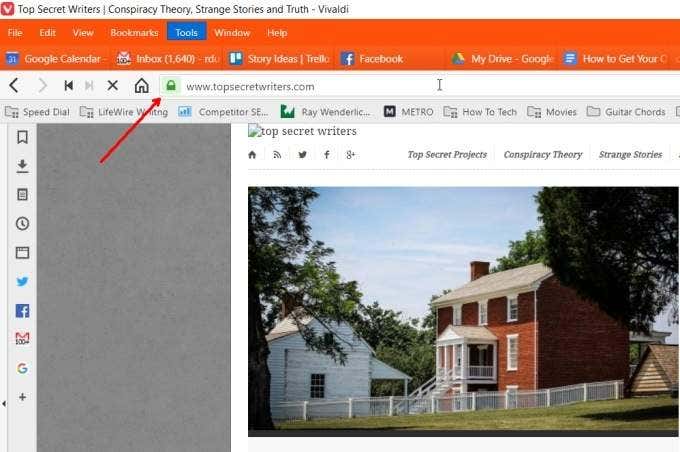
At this point, any visitors who’ve already visited your site will still use the old bookmark that has http in front of the domain. These visitors will still see the security warning in Chrome that your website is unsafe. This could cause you to lose a lot of visitors, since they won’t trust your website anymore and will stop visiting. You can fix this by forcing the browser of all of your visitors to modify the URL so that https is always in the front. In cPanel, in the Files section, double click the File Manager to open it. Navigate to the root level directory of your web directory. This is where you’ll find the .htaccess file. Right-click the file and choose Edit from the dropdown menu. .htaccess is the file that controls web server behavior when people visit your site. You need to add special code in this file to force your visitor’s browser to use https instead of http. Edit mode will open the .htaccess file in the default editor on your local computer. At the top of the file, insert the following code: When you close the file, it’ll ask if you want to save. Confirm the save. Now your new .htaccess file is active and users will be forced to access your site via HTTPS. Open a browser and type in the domain of your website. If the SSL certificate is working correctly, in Chrome you’ll see a lock icon which means that the site is loading via encrypted HTTPS protocol.
Other SSL Considerations
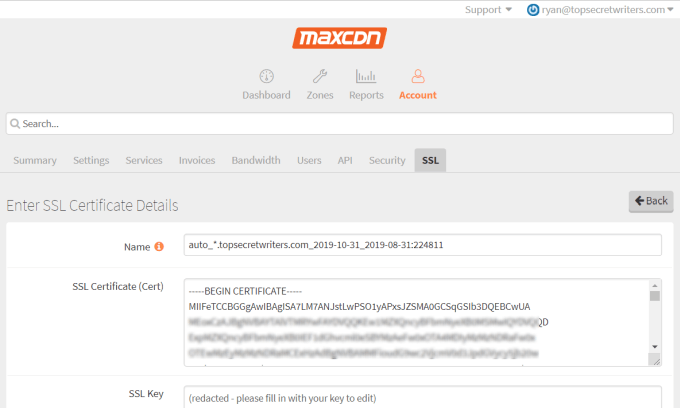
Even though your website is working properly, there are some features that will break once you switch over to SSL. One of those is if you’re using a CDN service to serve your images from different servers around the world. Large websites utilize CDN service to speed up image load times regardless where visitors are located around the world. Since your CDN is still serving images via HTTP protocol, when visitors access your site via HTTPS, all of those images will appear broken. To fix this, you’ll need to log into your CDN account, access SSL settings, and add a new SSL entry. You can paste the same certificate, key, and CA bundle in those fields. Once you save this entry, all images on your site will load via HTTPS protocol and load properly for all of your visitors. There are a lot of benefits to upgrading your website to use SSL certificates. Most importantly, it ensures communication between your visitor’s computer and your website are encrypted and protected from hackers. In addition, it brings your website up to the latest web standards and ensures that no one will see any security errors whenever they visit your site.