In this article you’ll find steps to whiten teeth in portrait photographs, as well as making it look natural. Too white of teeth can make a picture look fake, so it’s good to know the techniques available to whiten teeth in Photoshop.
Whiten Teeth in Photoshop With Hue & Saturation
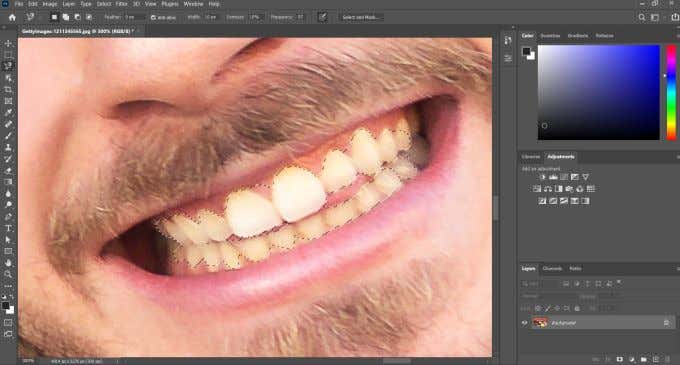
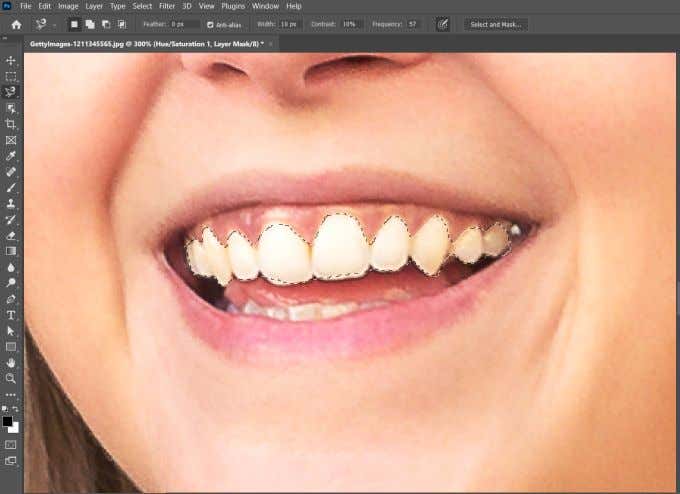
The best way to whiten teeth in Photoshop is through using the Hue & Saturation adjustment layer on your image. This makes it easy to whiten teeth not only for one person, but multiple people if need be. You’ll want to select and whiten multiple people’s teeth separately, as one person may need different adjustments than another. If you’re finding it difficult to make a clean selection, don’t worry too much as you can clean it up later on.
Clean Up Edges
You may find it difficult to precisely make a selection of the teeth. This is because some of the adjustment layer changes also affect areas around the teeth. However, you can clean this up easily. Choose the brush tool, and make sure that your foreground brush color is set to black. This is because with Photoshop’s adjustment layers, you can also use layer masking to hide or show parts of the adjustment. By using the brush, you can paint black to erase any part of the adjustment, and white to paint it back. So, in this case, you’ll want to use black to paint over the areas you don’t want affected by the adjustment layer. If you make a mistake, you can always swap your foreground color to white to re-paint an area.
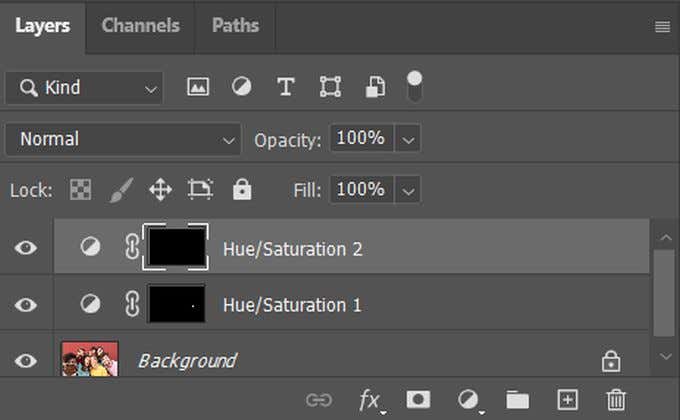
Whitening Teeth in Photoshop for Multiple Subjects
In some photos you may have more than one person whose teeth you want to whiten. The best thing to do in this case to create another, separate adjustment layer for this person. If you want to look at the original image before you added the adjustments, you can select on the eye icon on the left side of the adjustment layers in the layer panel in order to look at the original.
Making Teeth Look Naturally White
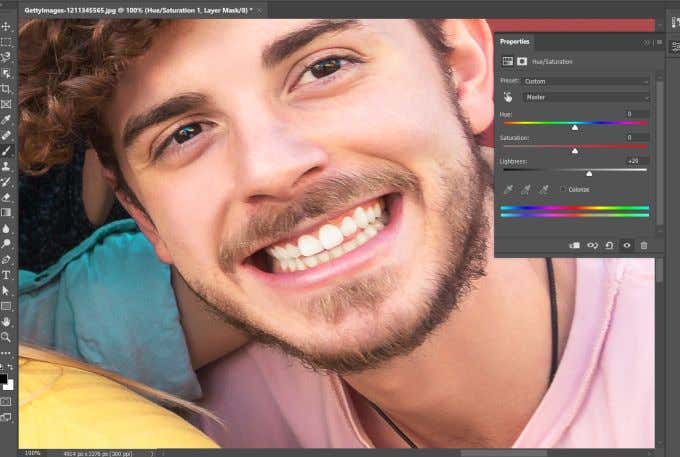
When using Hue & Saturation to whiten teeth in Photoshop, you’ll want to keep a few things in mind in order to not over-do the whitening and brightening. Doing so can make a picture look too unnatural. While removing the yellow hues from the teeth with the saturation slider, you’ll want to remember that all teeth are naturally a little bit yellow. Removing all traces of yellow can cause a smile to look a little odd. So, go for a more subtle effect so as to not make it obvious that touch-ups have been made. The same goes when you’re brightening teeth. You don’t want them to look blindingly white (unless that’s what you’re going for), so again, stick to a more subtle level when changing the lightness slider.